Adding a new free MySql database is really easy in aeonfree. In this guide, you will learn step by step how you can add a new database easily in free hosting.
Step 1. Login to your account
The first and most essential step is to log in to your Dashboard account. If you have not already created a hosting account, you will need to create one from here.
Step 2. Open the information page of your hosting account
The second step includes opening the information page of your hosting account. To do that, find the hosting account you want to use then click on the Information button.

Step 3. Switch to the MySql details tab
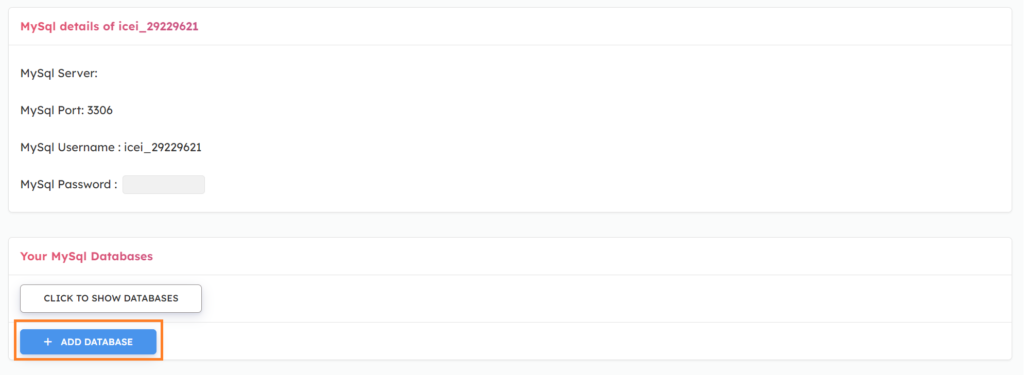
Use the navigation links to navigate to the MySql details tab, you will then be able to see your MySQL details like your username, password, and port.

Step 4. Click on the “Add Database” button
You can also see the list of your existing MySql databases. Click on “Click to Show Databases” to show the existing databases.
Below the list of your MySql databases, you will be able to see a “+Add Database” button. Click on the button to open the page to add a new database.
If you want to log in to the PhpMyAdmin of an existing database, you can do that by clicking the “PhpMyAdmin” option.
If you want to delete it, use the “Delete” button.

Step 5. Choose a database name
After clicking on the “+Add Database” button, you will be redirected to a different page where you will be able to enter a database name.
Then click on the “Create Database” button.

After clicking on the Create Database you should be able to see your new database name on the database page.

Congratulations ? You have now successfully added a free MySql database to your new hosting account.
Discussion
If you are facing any issues with the guide or want help somewhere, you can discuss it with us or the community on our forum page.
